How to configure wired 802.1X for Windows 7
IMPORTANT: Before you start, you need to enable a service called Wired AutoConfig. Without this service enabled, you will not be able to authenticate, and thus not gain access to the network. To enable Wired AutoConfig:
1. Click the Start button. In the Search box ("Start Search") type services.msc and press "Enter". You must be logged in as an administrator to start this service.
2. In the Services dialog box, click the "Standard" tab (located in the lower part of the window).
3. Scroll down to find the Wired AutoConfig service, right click and select "Start".
4. If you want Wired AutoConfig to start automatically every time you start your computer, right click "Wired AutoConfig" again and select "Properties". In the General tab, set Startup type to Automatic. Click "OK" and then
close the Services window.
Click on the start button and select 'Control Panel' , then click on 'View network status and tasks'
You should have a 'Local Area Connection', click it. A new window should appear:

LAN status
Click "Properties"
Choose the tag 'Authentication'. You should now have this window:
If you do not have the Authentication tab, read this document from the top on how to activate it.

LAN Properties
Make sure that your settings equals the ones in the above picture, if not adjust accordingly.
Click the button "Settings", and you get:
Protected EAP Properties
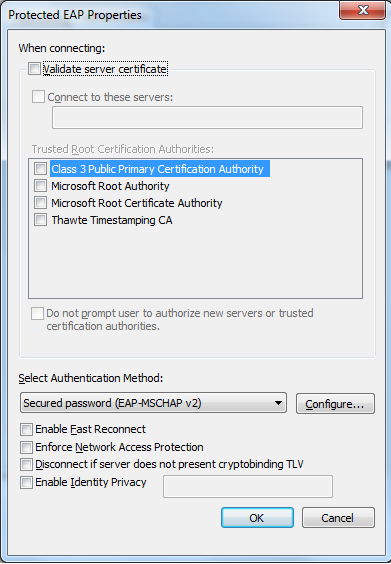
Make sure that your settings equals the ones in the above picture, if not adjust accordingly.
Click on "Configure", and a new window appears..
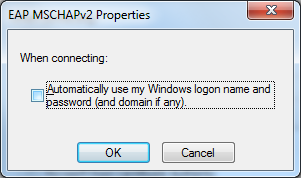
Uncheck user
Uncheck "Automatically use my Windows...".
Click 'OK' in this window, and the former (Protected EAP Properties)
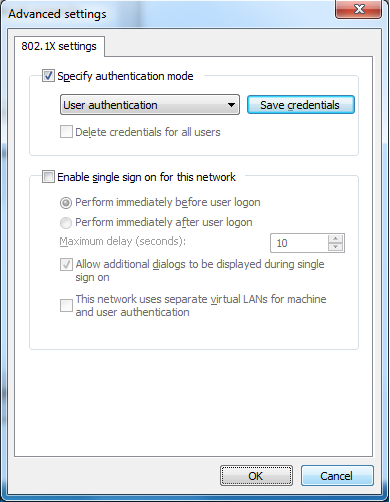
Click 'Additional Settings' in 'Local Area Connection Properties' and this window should appear:
Advanced settings
Check 'Specify authentication mode' and select 'User authentication'.
Click OK in this window and the former, and 'Close' in the last.
You have now finished configuring.
After a few seconds this should appear:
Local Area Connection boble
Click it, and this should appear:

Logon credentials
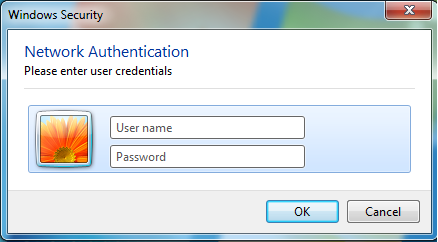
Enter your username and password. Click OK.
This might take some time the first time. If it does not appear, try rebooting.
You should now be connected.
출처: http://www.uio.no/english/services/it/network/student-residential-network/instructions/win7/
'windows' 카테고리의 다른 글
| ODBC 데이터 원본 관리자에 DSN이 보이지 않을때 (0) | 2012.07.04 |
|---|---|
| putty에서 한글 입력 (0) | 2012.02.27 |
| Windows Mail에서 메일을 백업 및 복원하는 방법 (0) | 2011.10.29 |
| Grep for Windows Using FINDSTR (0) | 2011.10.23 |
| 윈도우 64비트 플랫폼에서 32비트 DSN 설정 (ODBC) (0) | 2010.06.10 |